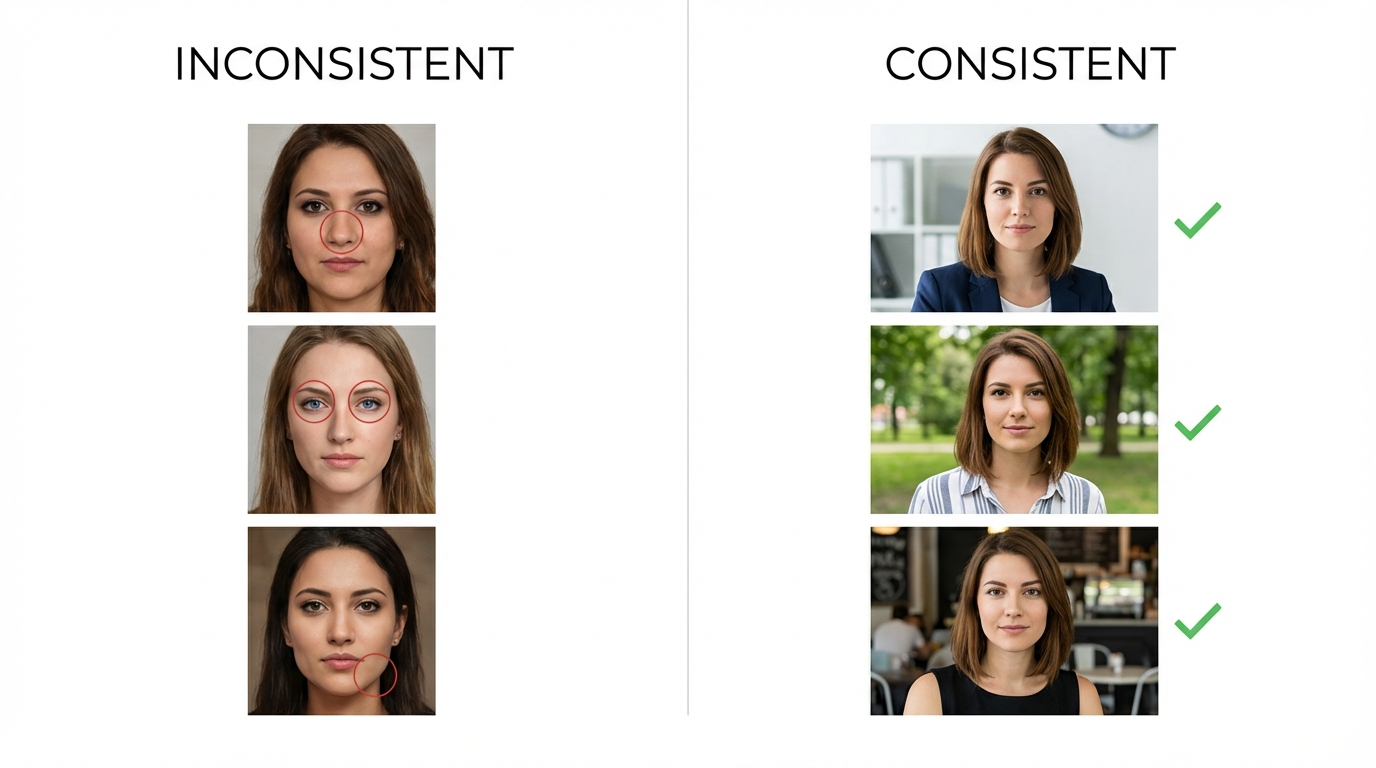
The number one reason AI characters fail to build audiences is inconsistency. The face shifts slightly between images. The nose is different in Tuesday's post than Monday's. The eyes change color depending on the prompt. Viewers cannot consciously identify what is wrong, but they subconsciously sense that something is off — and your engagement drops.
Character consistency is not a nice-to-have. It is the foundation that everything else is built on. Without it, your AI influencer looks like a different person in every post, which means followers never form the parasocial connection that drives engagement, loyalty, and revenue.
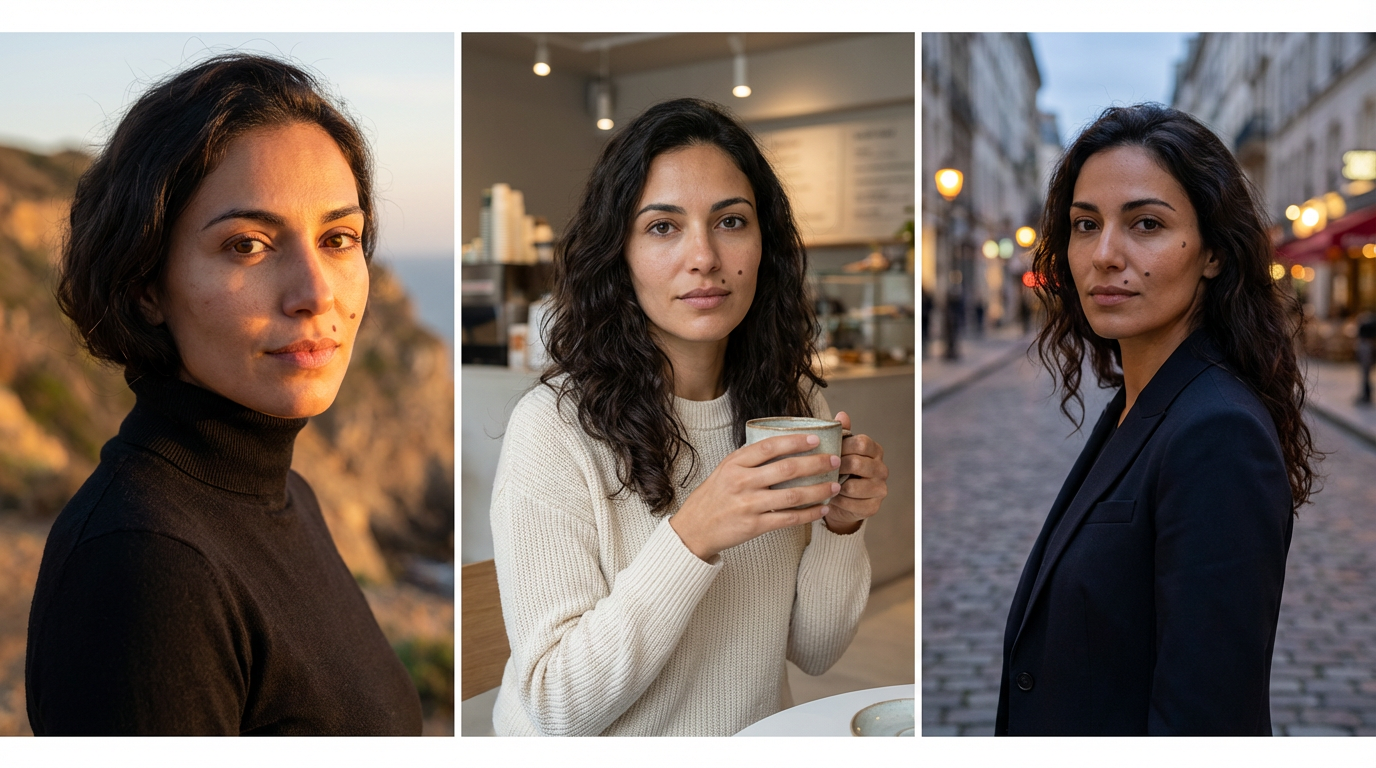
This guide walks through the complete technical workflow for creating an AI character that remains perfectly consistent across hundreds of images and videos — from initial face generation through reference libraries, dataset building, and full brand identity.
Why Character Consistency Matters More Than Anything Else
Before diving into the workflow, understand why this step cannot be rushed or half-done.
Human faces are processed by a dedicated region of the brain called the fusiform face area. It is extraordinarily sensitive to subtle changes. A 2mm shift in the distance between eyes, a slightly different jawline, a nose that is fractionally wider — your audience's brain registers these differences even when their conscious mind does not.
The result: viewers feel vaguely uncomfortable. They cannot pinpoint why. They just know something feels "off" about the content and they scroll past.
Compare this to accounts that maintain perfect consistency. The character looks exactly the same in every post — same bone structure, same eye shape, same proportions — but in different outfits, locations, lighting, and poses. The brain processes this the same way it processes a real person's content: it builds familiarity. Familiarity builds trust. Trust builds audience.
The Uncanny Valley of Inconsistency
An AI character that is 95% consistent is actually worse than one that is 100% clearly AI-generated. The near-misses create an uncanny valley effect where viewers sense something is wrong but cannot identify what. Either be perfectly consistent or do not attempt photorealism at all.
What Consistency Actually Means
Character consistency goes beyond just the face. A truly consistent AI character maintains:
- Facial proportions: Distance between eyes, nose width, lip shape, jaw angle — identical in every image
- Skin characteristics: Same freckle pattern, same mole placement, same skin tone
- Hair: Same color, same texture, same natural wave pattern (style can change, but the underlying hair should be the same)
- Body proportions: Same height-to-shoulder ratio, same build
- Aging markers: Same laugh lines, same under-eye characteristics
- Distinctive features: If your character has a dimple on the left cheek, it appears in every single image
Step 1: Create a Unique Face
This face is the foundation of your entire brand. Take your time here, because everything else is built around it.
Generating the Initial Face
The best tool for generating photorealistic faces is Nano Banana Pro on MakeInfluencer.ai. From a single detailed prompt, it creates a unique face that is indistinguishable from a real person.
The prompt structure for face generation:
[Age and gender], [ethnicity and skin tone], [specific facial features],
[hair description], [expression], [clothing], [setting and lighting],
[camera specifications]. No text, no watermark, no logo.
Example prompt:
A 24-year-old woman with Mediterranean olive skin, dark brown almond-
shaped eyes, naturally full eyebrows with a slight arch, straight nose
with a subtle bump on the bridge, full lips with a defined cupid's bow,
high cheekbones. Hair: dark brunette, shoulder-length with natural wave
and subtle highlights. Expression: warm genuine smile, showing top teeth,
slight crow's feet visible. Wearing a white crew-neck t-shirt. Setting:
bright natural window light from the left, soft shadow on right side of
face, slightly out-of-focus living room background with plants. Skin
texture: visible pores on nose and cheeks, natural oil sheen on T-zone,
faint beauty mark on right cheekbone. Shot on Canon R5, 85mm f/1.4,
ISO 200. No text, no watermark.
The Key to a Unique, Memorable Face
Avoid generic beauty descriptors like "beautiful woman" or "attractive face." Instead, specify distinctive features that make the face memorable and unique: a specific bump on the nose bridge, asymmetric dimples, a beauty mark in a particular location, slightly uneven eyebrows. Imperfections make faces believable and recognizable.
Selecting Your Character
Generate 5-10 variations from your prompt. Do not settle for the first output. You are looking for a face that:
- Feels like a real person — not a generically attractive AI render
- Has memorable features — something that makes the face distinctive and recognizable
- Matches your target audience — the face should be aspirational but relatable for your niche
- Photographs well from all angles — some AI-generated faces look great head-on but break down in three-quarter or profile views (you will test this in the next step)
Once you find the face, screenshot it. Save the exact prompt that generated it. This is your master reference.
Step 2: Build Your Reference Library
This is the step that 90% of AI creators skip — and it is the step that makes or breaks character consistency.
A single front-facing image is not enough. You need your character from every angle the AI will ever need to reproduce.
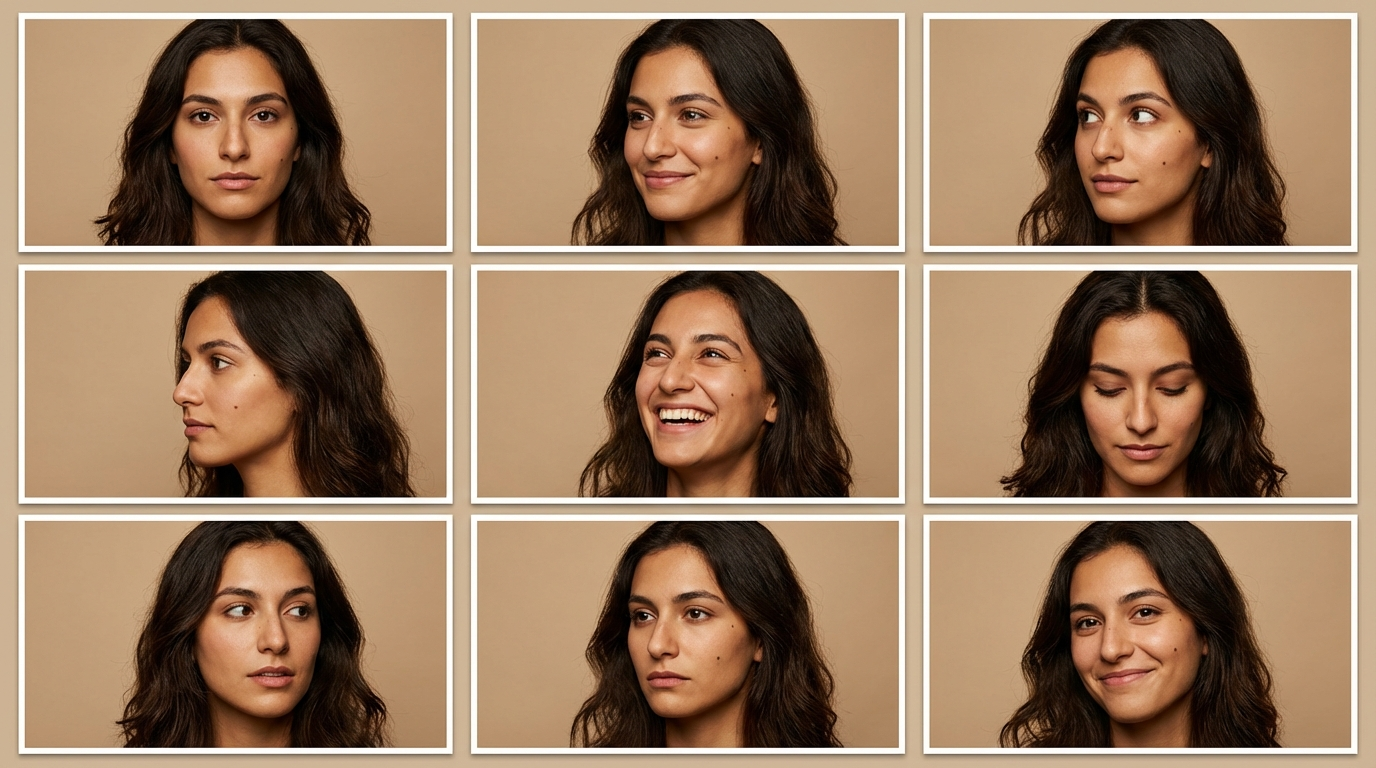
The 9-Panel Reference Grid
Upload your selected face image back to MakeInfluencer.ai and use this prompt:
Create a 9-section grid with this person's photos in different poses:
top-left: front-facing direct eye contact, top-center: three-quarter
view looking left, top-right: three-quarter view looking right,
middle-left: profile view facing left, middle-center: slightly looking
up with a natural smile, middle-right: looking down at something in
hands, bottom-left: laughing candidly with eyes crinkled, bottom-center:
serious/contemplative expression, bottom-right: casual candid moment
looking slightly off-camera
This grid gives you a complete library of your character's face from every angle and with multiple expressions — all perfectly consistent because they were generated from the same source image.
Why the Reference Grid Is Non-Negotiable
Without a multi-angle reference grid, every new prompt is a coin flip. The AI might generate a slightly different face because it only has one reference point and fills in the gaps with assumptions. With a complete reference grid, the AI has explicit information about what the character looks like from every angle. This eliminates drift.
Expanding the Reference Library
Beyond the 9-panel grid, generate additional reference images for:
Body reference shots:
- Full body standing (front, side, back)
- Seated poses (at a desk, on a couch, at a cafe table)
- Walking/movement poses
- Different outfit styles (casual, formal, athletic, evening)
Lighting reference shots:
- Natural daylight (golden hour, midday, overcast)
- Indoor ambient lighting
- Studio lighting (high key, low key)
- Night/artificial lighting (neon, streetlights, candlelight)
Expression reference shots:
- Neutral resting face
- Genuine smile (not forced)
- Laughing
- Talking (mid-speech)
- Focused/concentrated
- Surprised
Store all of these in an organized folder. This is your character's "dataset" — the source of truth that ensures every future generation matches.
Generate Master Face
Create the initial face using Nano Banana Pro with a highly detailed prompt. Generate 5-10 variations and select the most distinctive, photorealistic result.
Build 9-Panel Grid
Use your master face to generate a multi-angle reference grid: front, three-quarter, profile, various expressions. This becomes your character's definitive visual reference.
Expand Body References
Generate full-body shots in various poses, outfits, and settings. Maintain facial consistency while establishing the character's body proportions and style.
Generate Lighting Variations
Create reference images under different lighting conditions: daylight, studio, artificial. This teaches you how the character's features appear across lighting scenarios.
Organize and Catalog
Store all reference images in clearly labeled folders. This is your character bible — every future generation references this library.
Step 3: Build Your Dataset
For maximum consistency across diverse content, you need a structured dataset. This is especially important if you plan to produce hundreds of images and videos over time.
What a Good Dataset Includes
You need at least three categories of reference images:
- Face images (minimum 30): Close-up and medium shots focusing on facial features from multiple angles
- Body images (minimum 30): Full-body and three-quarter body shots showing proportions and posture
- Combined face + body images (minimum 30): Complete shots that show how the face and body relate in natural poses
Gathering Body References
For body reference images in different poses, you can use Pinterest or similar platforms to find reference poses that match your character's intended aesthetic. Search for poses that match your niche:
- Lifestyle/fashion: casual poses, street style, cafe moments
- Fitness: gym poses, active movement, athletic wear
- Travel: scenic backgrounds, adventure poses, cultural settings
- Professional: office settings, speaking poses, corporate environments
These references inform the poses and compositions you will prompt for — they are not used as training data directly but as visual guides for your prompts.
Labeling Your Images
Each image in your dataset should have a corresponding text description. This is critical for maintaining consistency when using the images as references for future generation.
Label format:
[trigger_word], [description of pose], [clothing], [setting],
[lighting], [expression], [camera angle]
Example:
maya, three-quarter body shot, standing in a modern kitchen,
wearing a cream knit sweater and jeans, warm afternoon window
light, genuine smile, eye-level camera angle
The trigger word (your character's name) is important — it becomes the reference keyword that ties all images to this specific character.
Dataset Quality Over Quantity
30 diverse, high-quality images per category beats 200 repetitive ones. The key is variety: different angles, lighting, poses, expressions, and settings. Repetitive datasets teach the AI a narrow version of the character that breaks down when you need something outside that narrow range.
Step 4: Advanced — LoRA Training for Maximum Consistency
For creators who need absolute consistency across thousands of images and want the most control, LoRA (Low-Rank Adaptation) training offers the gold standard.
What Is LoRA Training?
LoRA training teaches an AI model to recognize your specific character by a trigger word. After training, you can include that trigger word in any prompt and the model will reproduce your character's exact features — regardless of the setting, pose, or lighting.
Think of it as teaching the AI a new concept: "whenever I say 'maya', generate this specific person."
The Training Process
Prepare Your Dataset
Organize your 90+ reference images into the three folders: face, body, and face+body. Each image must have a matching text description file with the trigger word and detailed tags.
Structure Your Folders
Create a clean folder structure: /character_name/face/, /character_name/body/, /character_name/combined/. Each folder should contain at least 30 images with matching .txt description files.
Upload to Training Environment
Use ComfyUI-based workflows or training services to upload your dataset. Configure training parameters: learning rate, epochs, and batch size according to your dataset size.
Train the LoRA
Run the training process. This typically takes 30-60 minutes depending on dataset size and hardware. The output is a LoRA file that encodes your character's visual identity.
Test and Validate
Generate test images using just your trigger word in various scenarios. Verify that the face remains consistent across different poses, outfits, lighting, and settings. If there is drift, adjust your dataset and retrain.
LoRA Training Is Optional, Not Required
LoRA training gives the absolute highest level of consistency, but it is not required for most creators. The reference grid + detailed prompting approach described in Steps 1-3 is sufficient for building an audience. Consider LoRA training when you are producing 50+ images per week and need industrial-scale consistency.
Common Training Mistakes
- Dataset too uniform: If all your training images show the character in the same pose with the same expression, the LoRA will only reproduce that specific look. Include diverse angles and expressions.
- Poor image quality: Training on low-resolution or blurry images produces a LoRA that generates low-quality output. Every training image should be sharp and well-lit.
- Wrong trigger word: Choose a unique trigger word that does not conflict with common words the model already knows. Use a made-up name or uncommon word combination.
- Over-training: Training for too many epochs causes the model to memorize your exact training images rather than learning the character's features. The result is rigid output that cannot adapt to new scenarios.
Step 5: Generate Content Scenes
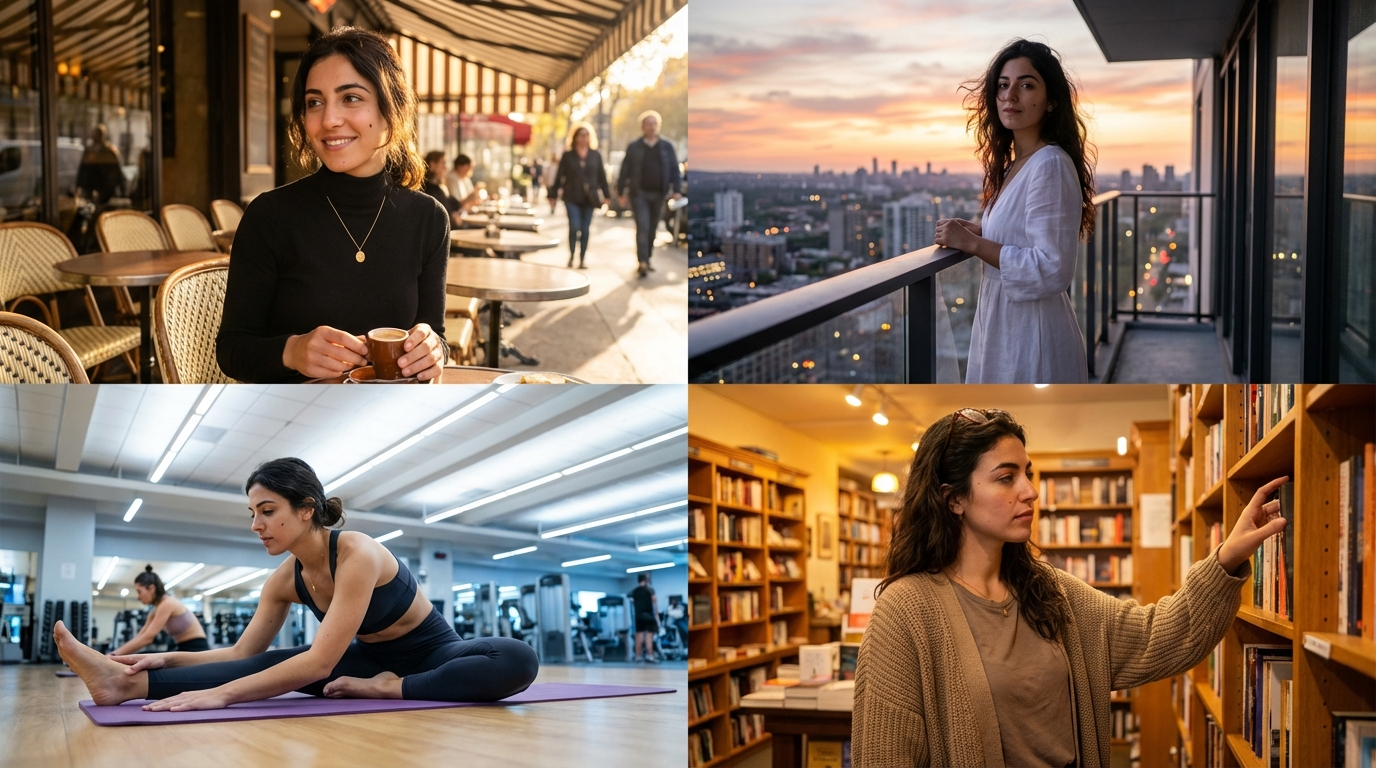
With your reference library built and your character defined, you can now generate content at scale while maintaining perfect consistency.
The Prompting Framework for Consistent Characters
Every prompt should include:
- Character description (copied from your master reference)
- Specific scenario (what the character is doing)
- Setting details (environment, background objects)
- Lighting specification (type, direction, color temperature)
- Camera specifications (lens, aperture, angle, distance)
- What to avoid (inconsistency markers)
Example content prompt:
A 24-year-old Mediterranean woman with dark brunette shoulder-length
wavy hair, olive skin, dark brown almond eyes, beauty mark on right
cheekbone [your character description], sitting at a marble cafe table
in a Parisian sidewalk cafe. She is holding a small espresso cup,
looking slightly off-camera to the right with a relaxed half-smile.
Wearing a black fitted turtleneck and gold pendant necklace. Late
afternoon golden hour light casting warm tones on her face, soft
shadows from an overhead cafe awning. Background: blurred Haussmann
buildings, other cafe patrons, string lights. Shot on Fujifilm X-T5,
56mm f/1.2, warm color grading. No text, no watermark.
The key is always including the full character description in every prompt. Do not rely on the model to "remember" your character from previous generations — each prompt is independent.
Batch Generation Strategy
Generate content in themed batches for efficiency:
Monday batch — Lifestyle content:
- Character at a coffee shop (3 variations: different angles, different drinks)
- Character at home in casual wear (3 variations: reading, cooking, stretching)
- Character walking through a city street (2 variations: different outfits)
Wednesday batch — Fashion content:
- Character in 5 different outfits in a consistent setting
- Full-body and detail shots for each outfit
- 1-2 video generations for Reels
Friday batch — Cinematic/storytelling:
- Character in dramatic lighting scenarios
- Travel-themed content with interesting backgrounds
- Evening and night scenarios
Save Your Winning Prompts
When a prompt produces an especially good result, save it as a template. Build a library of proven prompts that you can modify for new content. Over time, you will have dozens of templates that reliably produce consistent, high-quality output — and your production speed will increase dramatically.
Step 6: Upscale to Photography Quality
After generation, images often have subtle signs of their AI origin: slightly soft details, imperfect skin texture at the micro level, or a general "smoothness" that does not match the look of a photograph.
Upscaling fixes this.
The Upscaling Process
- Select your generated image — focus on the ones you plan to publish
- Upload to an AI upscaler — MakeInfluencer.ai supports image enhancement, and dedicated tools like AI Image Upscaler add fine detail
- Review the result — zoom in on skin texture, hair strands, fabric details, and background elements. The upscaled version should show details that were not visible in the original.
What Upscaling Improves
| Before Upscaling | After Upscaling |
|---|---|
| Soft facial details | Sharp, visible pores and skin texture |
| Smooth hair blobs | Individual hair strands visible |
| Flat fabric surfaces | Visible fabric weave and natural creasing |
| Blurry background | Coherent background detail |
| Generic eye texture | Detailed iris patterns and natural catchlights |
The difference between a raw AI generation and an upscaled image is the difference between "that might be AI" and "that is definitely a photograph." For content that needs to pass as real — especially on Instagram where image quality is scrutinized — upscaling is not optional.
Step 7: Clean Metadata
This step is critical and frequently overlooked. AI generation tools embed metadata in image files — technical tags, generation parameters, model identifiers, and processing information that can reveal the image's origin.
Why Metadata Cleaning Matters
- Platform detection: Social media platforms increasingly scan metadata for AI generation markers
- Reverse engineering: Competitors or curious viewers can extract generation parameters from your images and replicate your character
- Authenticity: Clean files behave identically to photographs from a camera or phone
How to Clean Metadata
Strip all EXIF data, XMP data, and IPTC metadata from your final images before publishing. Tools like ExifTool or built-in OS features can remove this information in bulk.
What to remove:
- All EXIF camera data (even fake data that AI tools inject)
- Software identification tags
- Generation parameters
- GPS data (if any)
- Timestamps (or replace with realistic ones)
Protect Your Character Identity
If you have invested time in creating a unique, consistent character, metadata cleaning protects that investment. Without it, someone can download your image, extract the generation parameters, and potentially reproduce something very similar. Clean your files. Every time.
Step 8: Warm Up Your Accounts Before Launch
This step is often ignored but it has a measurable impact on early content performance.
When you create a new Instagram, TikTok, or X account and immediately start posting AI-generated content, the platform has no context for who you are. The algorithm does not know what niche you are in, what type of audience should see your content, or whether your account is a real user or a spam bot.
The Warm-Up Protocol
- Days 1-3: Create the account with a complete bio, profile photo (your AI character), and a link. Do not post anything.
- Days 1-3: Spend 15-20 minutes per day scrolling your niche. Watch reels, like content from accounts similar to what you are building, follow 10-15 accounts in your niche daily. Comment genuinely on 5-10 posts.
- Days 4-5: Post your first 1-2 pieces of content. Keep them simple — a strong image with a good caption. Do not post a reel yet.
- Day 6+: Begin your regular posting schedule. The algorithm now has 5 days of behavioral data that says "this account is interested in [your niche]" before it needs to decide who to show your content to.
This warm-up period makes a measurable difference. Accounts that warm up for 3-5 days before posting consistently see 2-3x more reach on their first reels compared to accounts that post immediately after creation.
Step 9: From Photos to Video
Once you have a library of consistent character images, video is the next step — and it is where engagement skyrockets.
Video Generation Paths on MakeInfluencer.ai
Path 1: Image-to-Video with Motion Control
Take any static character image and bring it to life with natural movement. Kling v3.0 produces the most realistic human motion — subtle weight shifts, natural hand gestures, realistic breathing movement.
| Model | Best For | Credits |
|---|---|---|
| Kling v3.0 Pro | Highest quality facial expressions and body movement | 5,000 credits/sec |
| Kling v3.0 Standard | Good quality for most content needs | 4,000 credits/sec |
| Sora 2 | Cinematic scenes with automatic audio | 40,000-120,000 credits |
| Veo 3.1 | Google's model with advanced audio generation | 8,000-12,000 credits/sec |
| WAN 2.6 Flash | Fast drafts and variations | 3,000-5,000 credits/sec |
Path 2: Talking Head with Lip Sync
Turn your character into a speaking presenter. Upload a character image and either text or audio, and the Lip Sync tool generates a video of your character speaking with frame-accurate lip synchronization.
- Videos up to 10 minutes long
- Natural mouth movement that matches the audio
- Micro-expressions during speech (eyebrow raises, eye movements, head tilts)
- Consistent character identity throughout the entire video
This is how creators produce full talking-head reels, video podcasts, and explainer content without ever recording themselves.
Path 3: Cinematic B-Roll
Use Sora 2 or Veo 3.1 to generate cinematic clips of your character in dynamic scenes. Walking through a city, working at a desk, exercising, cooking — these clips provide the B-roll footage that makes content feel professionally produced.
Lip Sync (Up to 10 Min)
Turn static character images into speaking videos. Frame-accurate lip synchronization with natural micro-expressions.
Kling v3.0 Motion
Best-in-class human motion quality. Natural body movement, realistic facial expressions, and coherent physics.
Sora 2 Cinematic
Film-quality video with automatic audio generation. Cinematic camera movements and lighting.
WAN 2.6 Flash
Fast and affordable video generation for drafts, stories, and quick-turnaround content at 3,000 credits/sec.
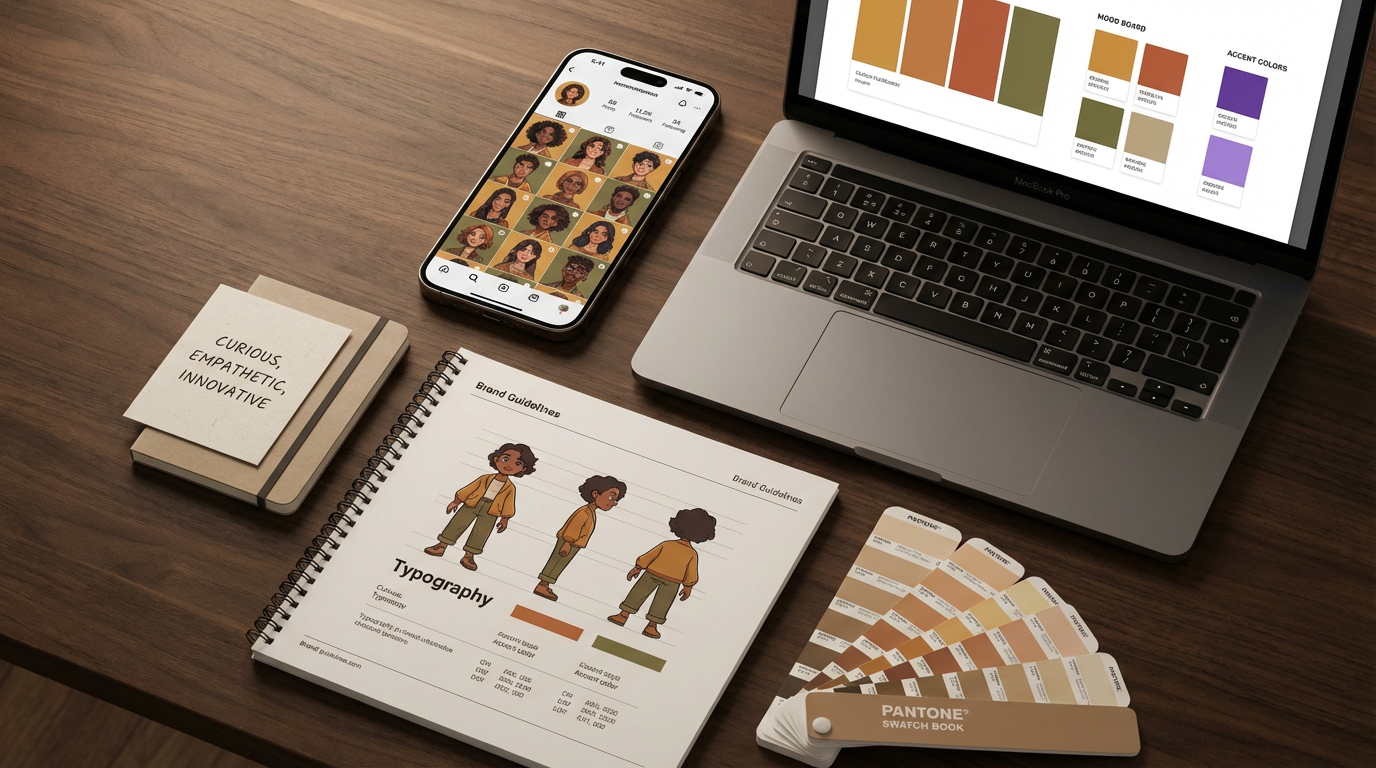
Step 9: Building the Brand Identity
A consistent character is the visual foundation — but a brand is more than a face. This step turns your character into a complete persona that audiences connect with.
The Brand Identity Checklist
Visual identity:
- Consistent color palette in content (warm tones, cool tones, specific accent colors)
- Signature clothing style or recurring fashion elements
- Preferred settings and environments that define the "world" your character lives in
- Consistent editing style (color grading, contrast, composition preferences)
Personality identity:
- Voice and tone (casual and fun, intellectual and measured, bold and provocative)
- Topics and themes they care about
- Opinions and perspectives on niche topics
- How they interact with followers (supportive, sarcastic, educational, motivational)
Content identity:
- Recurring content formats (weekly series, daily check-ins, monthly deep-dives)
- Visual templates that followers recognize instantly
- Signature hooks or catchphrases
- Consistent posting schedule that audiences can rely on
Write a Character Bible
Create a single document that defines everything about your character: physical description (copied from your master prompt), personality traits, backstory, communication style, opinions, aesthetic preferences, and content strategy. Every piece of content should be checked against this document for consistency. The character bible is as important as the reference grid — it ensures behavioral consistency alongside visual consistency.
Platform-Specific Brand Adaptation
Your character's brand should feel native to each platform while remaining recognizably the same person:
- Instagram: Polished, visually curated. Grid layout should tell a cohesive story.
- TikTok: More casual and spontaneous. Same character but in "off-duty" mode.
- YouTube: Longer-form, more depth. The character can show more personality.
- X/Twitter: Opinionated, concise. The character's voice and perspectives shine here.
The Complete Workflow Summary
Here is the full character creation pipeline from start to finish:
The Character Consistency Pipeline
Generate Master Face
Create a unique, photorealistic face using Nano Banana Pro with detailed feature specifications
Build Reference Grid
Generate 9-panel multi-angle reference showing your character from every direction and expression
Expand Dataset
Create 90+ reference images across face, body, and combined categories with diverse poses and settings
Generate Content
Produce images and videos using your reference library, always including the full character description in prompts
Upscale and Clean
Enhance image quality with upscaling and strip all metadata before publishing
Build the Brand
Define personality, voice, aesthetic, and content strategy. Write the character bible.
Launch and Scale
Publish consistently, maintain the character bible, and expand into video content
The entire process from initial face generation to first published post can be completed in a single day on MakeInfluencer.ai. The reference library and dataset building take the most time — but this investment pays dividends across every piece of content you produce afterwards.
MakeInfluencer.ai Plans
Common Consistency Pitfalls and How to Fix Them
Even with a solid reference library, certain scenarios can cause consistency drift. Here is how to handle them:
Pitfall: Different Lighting Changes Skin Tone
Warm lighting makes skin appear more golden; cool lighting adds blue/pink undertones. This can make your character look like different people across posts.
Fix: Always include your character's base skin tone in the prompt alongside the lighting specification. For example: "olive skin with warm undertones (maintain consistent skin color despite cool ambient lighting)."
Pitfall: Extreme Angles Distort Features
Profile views and extreme close-ups can distort perceived facial proportions, making the character look inconsistent with front-facing shots.
Fix: Reference your 9-panel grid when generating extreme angles. Include the grid as a reference image and specify "maintain exact facial proportions from reference" in your prompt.
Pitfall: Outfit Changes Affect Perceived Body Shape
Heavy jackets make characters look broader; fitted clothing shows different proportions than loose clothing. Viewers may perceive these as different people.
Fix: Maintain consistent body proportions in your prompts regardless of clothing. Specify body build ("slim athletic build, 5'7") consistently rather than letting the model infer proportions from the clothing description.
Pitfall: Expression Drift Over Time
As you generate hundreds of images over weeks, subtle drift can accumulate — the smile gets slightly wider, the resting face shifts, the eyes narrow fractionally.
Fix: Every 50 generations, compare your latest output against the original master reference. If drift has occurred, regenerate using the master reference as the primary source. Regular calibration prevents accumulated drift from becoming noticeable.
Character consistency is the unglamorous, foundational work that separates AI accounts with 500 followers from AI accounts with 500,000. Every hour you invest in building a solid reference library and character system saves dozens of hours in wasted regeneration and inconsistent output down the line.
Start with the face. Build the grid. Expand the library. Then create content that looks like the same person, every single time.
Related Guides:
- How to Create an AI Influencer — Full character creation and monetization guide
- Character Consistency in AI Images — Deep dive into consistency techniques
- AI Image Editing Guide — Master Nano Banana Pro and Qwen 2.0
- Best AI Models for Image Generation — Compare all image models
- AI Video Generation Guide — Complete video creation walkthrough